Having installed my 21mm Eibach Pro-Spacers, I have finished installing my 19" RS Speedline STEEV wheels. The 30mm spacers would have looked much better and given a better and wider look, but nevertheless I am happy with the results. I am now considering going for the Eibach Pro Springs to lower the car by 30mm.
Below are some pics of the 19" Speedline STEEV wheels installed:
I finished installing my Eibach 21mm Pro-Spacers all the way around. I ordered 20mm but the supplier ordered 21mm from Eibach so was given the 21mm. Nevermind :) it took 3 weeks to arrive so I don't think I will fuss about 1mm :)
Having now installed them, I think the 30mm spacers would have looked much better. The 21mm dont make the wheels stick out as much as I would have liked. I was advised to go with 20mm by someone who fitted 30mm's and then reverted back to 20mm because it effected the handling. Nevertheless, the 21mm is much better than having no spacers at all.
Below are a few pics of the Eibach Pro Spacer installation:
The OEM exhaust on the Megane III is angled downwards. Therefore, in order to utilise the OEM exhaust and have the exhaust fumes directed through the central chrome exhaust trim, I had AmD Tuning in Essex build and install a custom fabricated exhaust tailpipe with a rubber hanger mount system. They made the tailpipe with a rectangular tip instead of a regular rounded tip. This looks much better when looking through the chrome exhaust trim.
A massive thanks goes to the guys at AmD Tuning. They did a superb job on the exhaust tailpipe and rubber hanger mechanism. The guys at AmD Tuning were very helpful. I've added a link to their website in the related links.
Below are some pics of the custom tailpipe work carried out by AmD Tunning. The hanger mechanism is nicely hidden away and cannot be seen through the chrome exhaust trim.
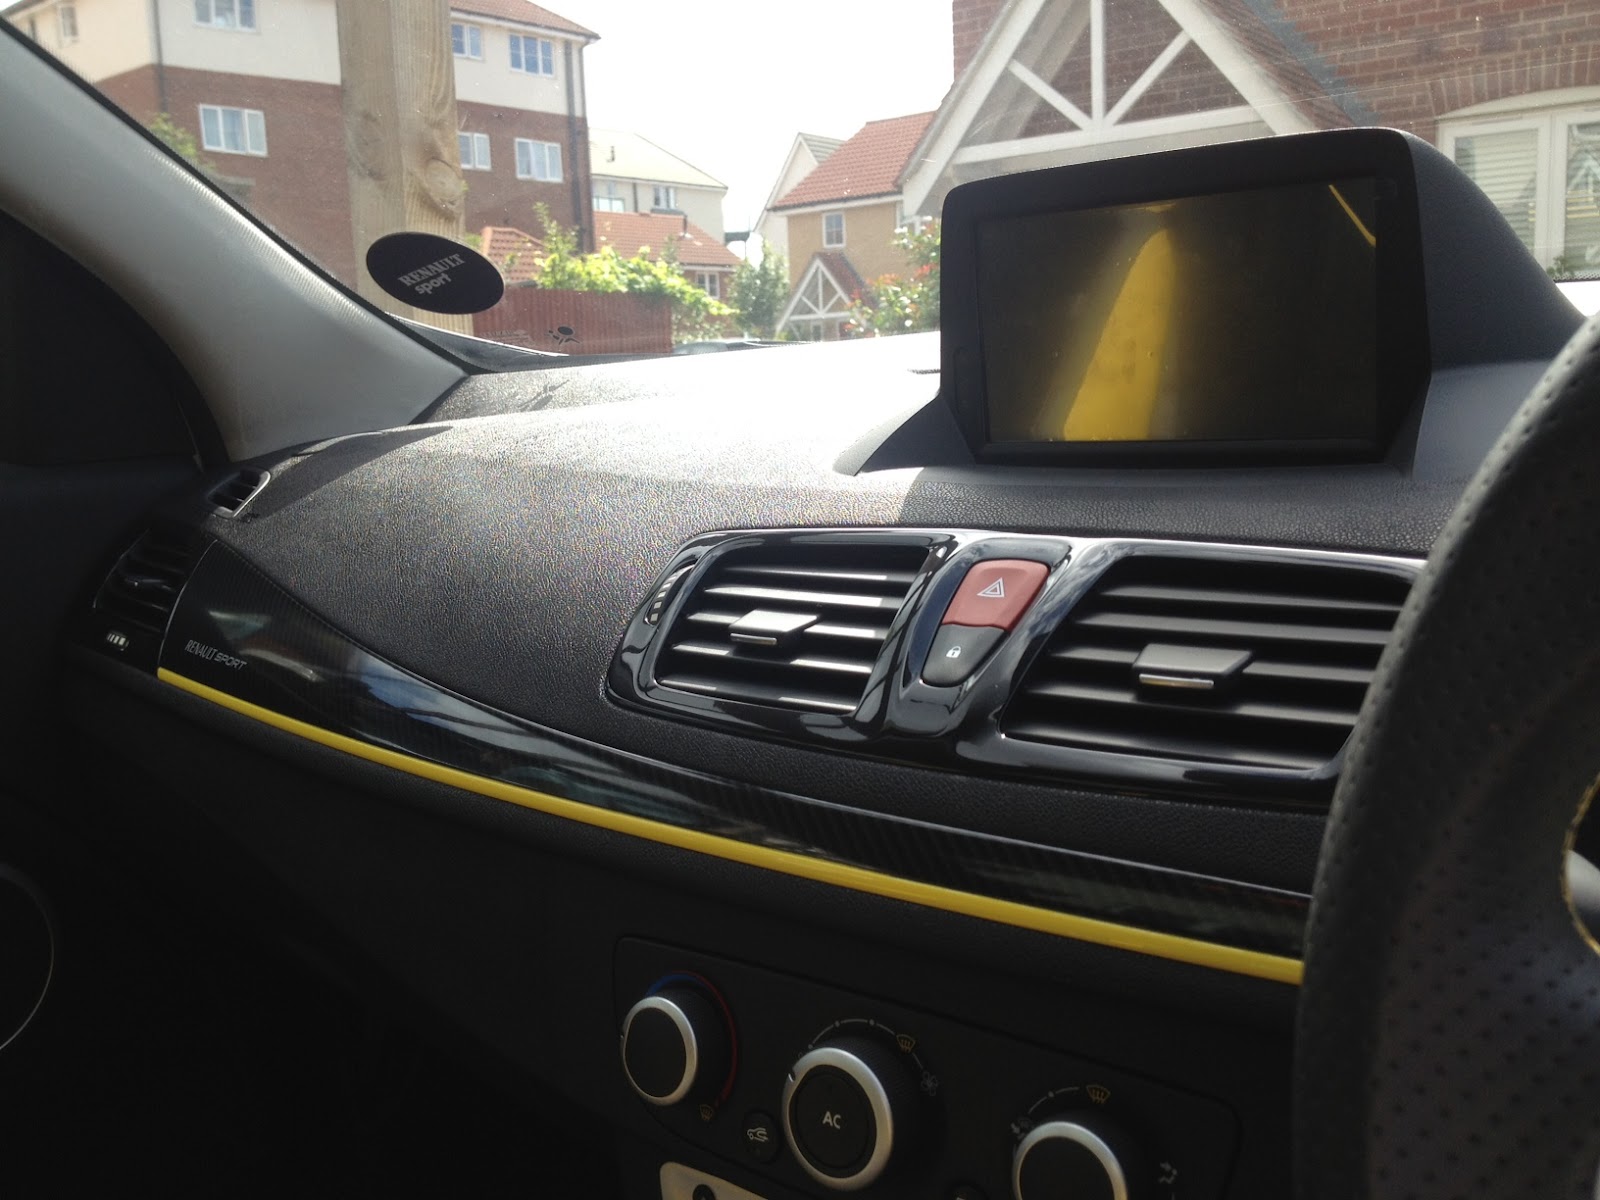
I decided to paint the lower section of the RenaultSport dashboard trim in gloss yellow. Below are some pics of the finished dashboard trim painted with a gloss yellow stripe to replace the OEM silver.
Previously, I had wrapped my center air-vent in brushed aluminium 3M Di-Noc to match my silver side air-vents (details about this can be found here). However, I now like the gloss black versions that come on the new megane 265, I think it looks much better so decided to gloss black some interior trims myself. I decided to paint the following parts in gloss black:
- Center and Side dashboard air-vent trims
- Interior Door Handles (possibly exterior handles too)
- Centre Console
I had some time last week and weather was good so managed to complete the air-vent trims. The interior door handles and centre console is to follow maybe sometime next week.
I'm also thinking to paint the lower-section of the carbon-style dashboard trim. The lower-section is factory painted in silver. I'm thinking to paint this in yellow and planning to do this end of the month. (***UPDATE*** This has now been painted, pics can be found here)
Below are pics of my DIY painting of the air-vent trims. I was after a deep-gloss finish, which comes from several layers of wet sanded clear-coat.
DIY Guide's Related to this mod
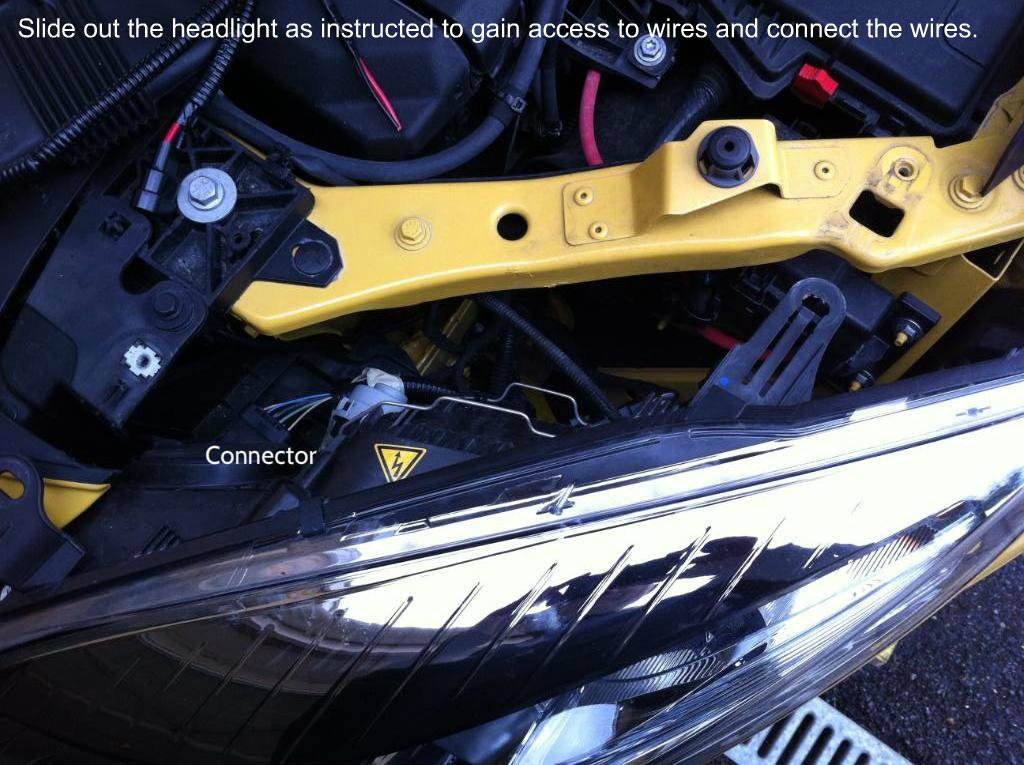
Following up from my post dated 21st April 2012 regarding my RS250 DRL Override Kit, here are some photos and install details submitted by MeganeSport.net user "250RS". The DRL on his Megane RS250 now stay on with his sidelights and headlights. The DRL's go into dim mode which is approximately 55% dimmer than in DRL mode. The kit is also compatible with auto headlight mode. When its dark the headlight comes on and the LEDs go into dim mode.
As mentioned in my previous post, this override kit is plug & play and does not require cutting or tampering with wires. Only exception to this is the need to connect to the sidelight circuit. This is done using 2 simple ScotchLok connectors. If you ever need to disable the system, you can simply remove the inline blade fuse and this will disable the override functionality. If you are worried about effecting your warranty, you could remove the entire system very easily. The system is completely reversible. Only thing you would need to do is cover the 2 small areas of the wire that the ScotchLock connector is connected to using an insulating sleeve or even a small amount of pvc insulation tape.
I am offering to sell these kits on a made-to-order basis for an introductory price of £100 + P&P. If you're interested, feel free to contact me via the contact form.
Installation Guide Available by Clicking Here
Here are the photos he has taken and posted of his successful installation today.


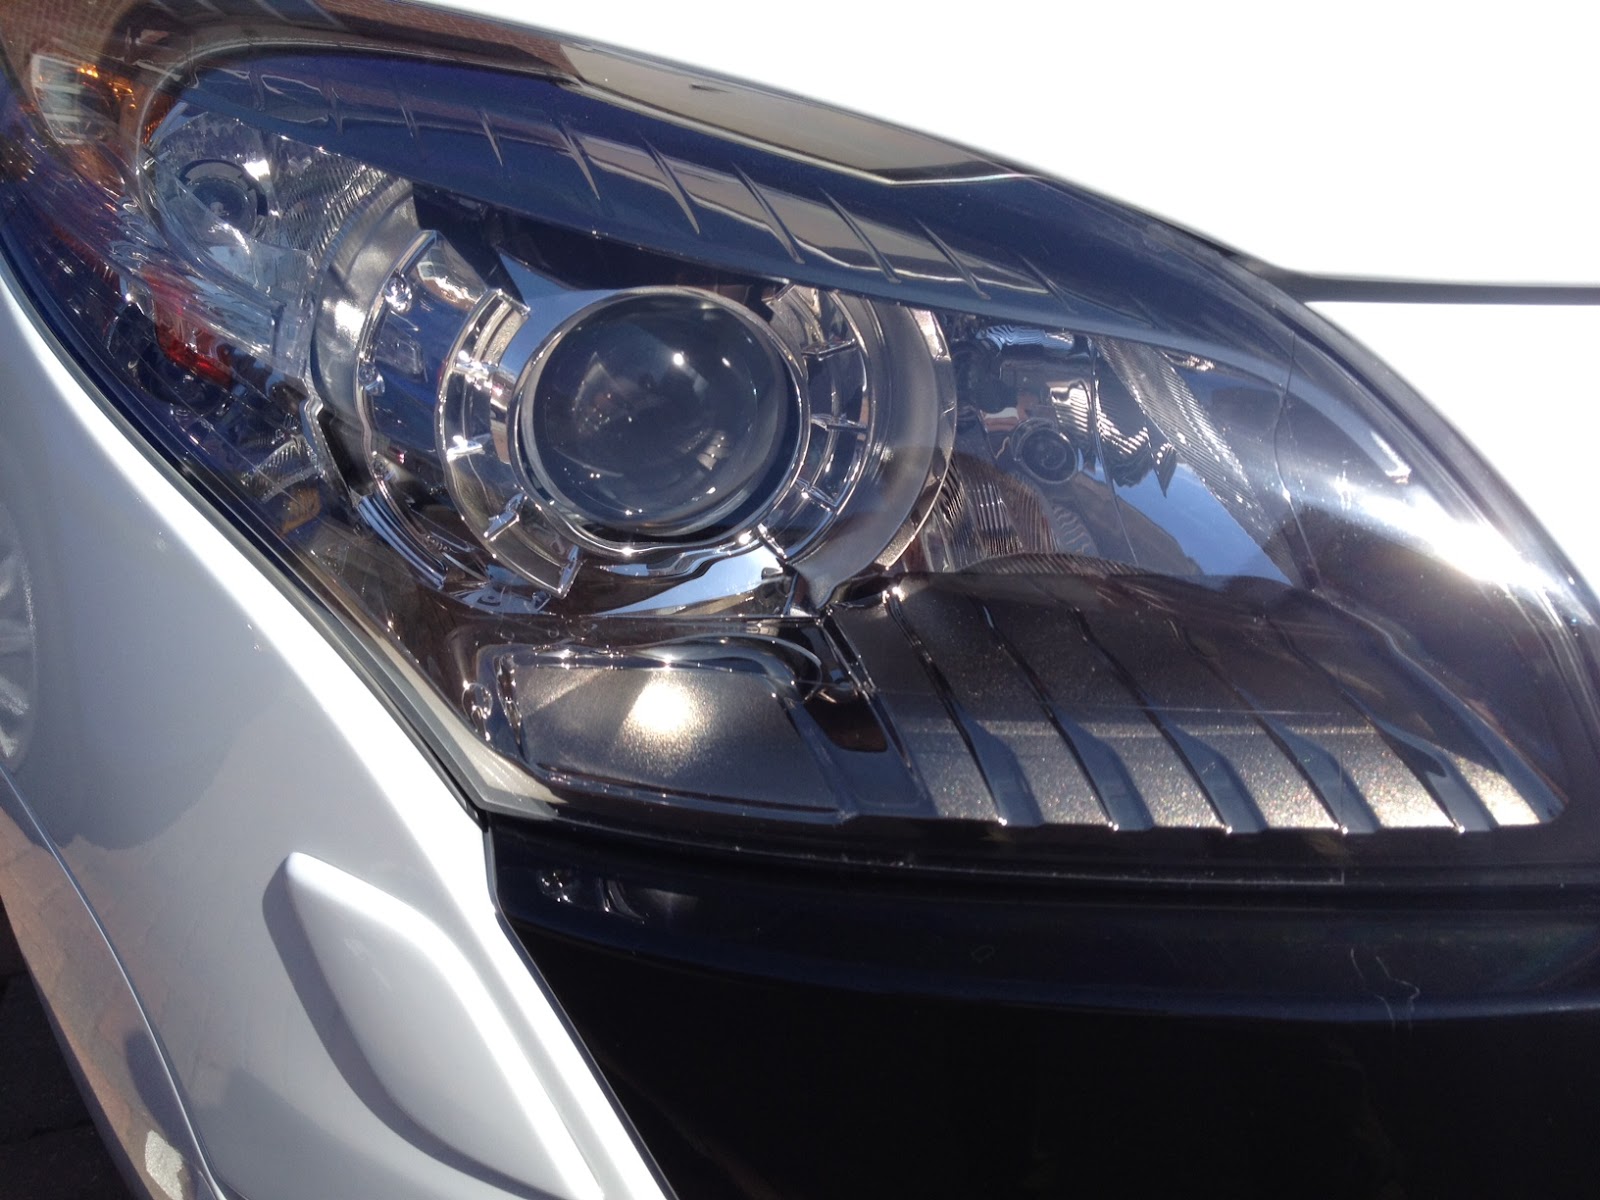
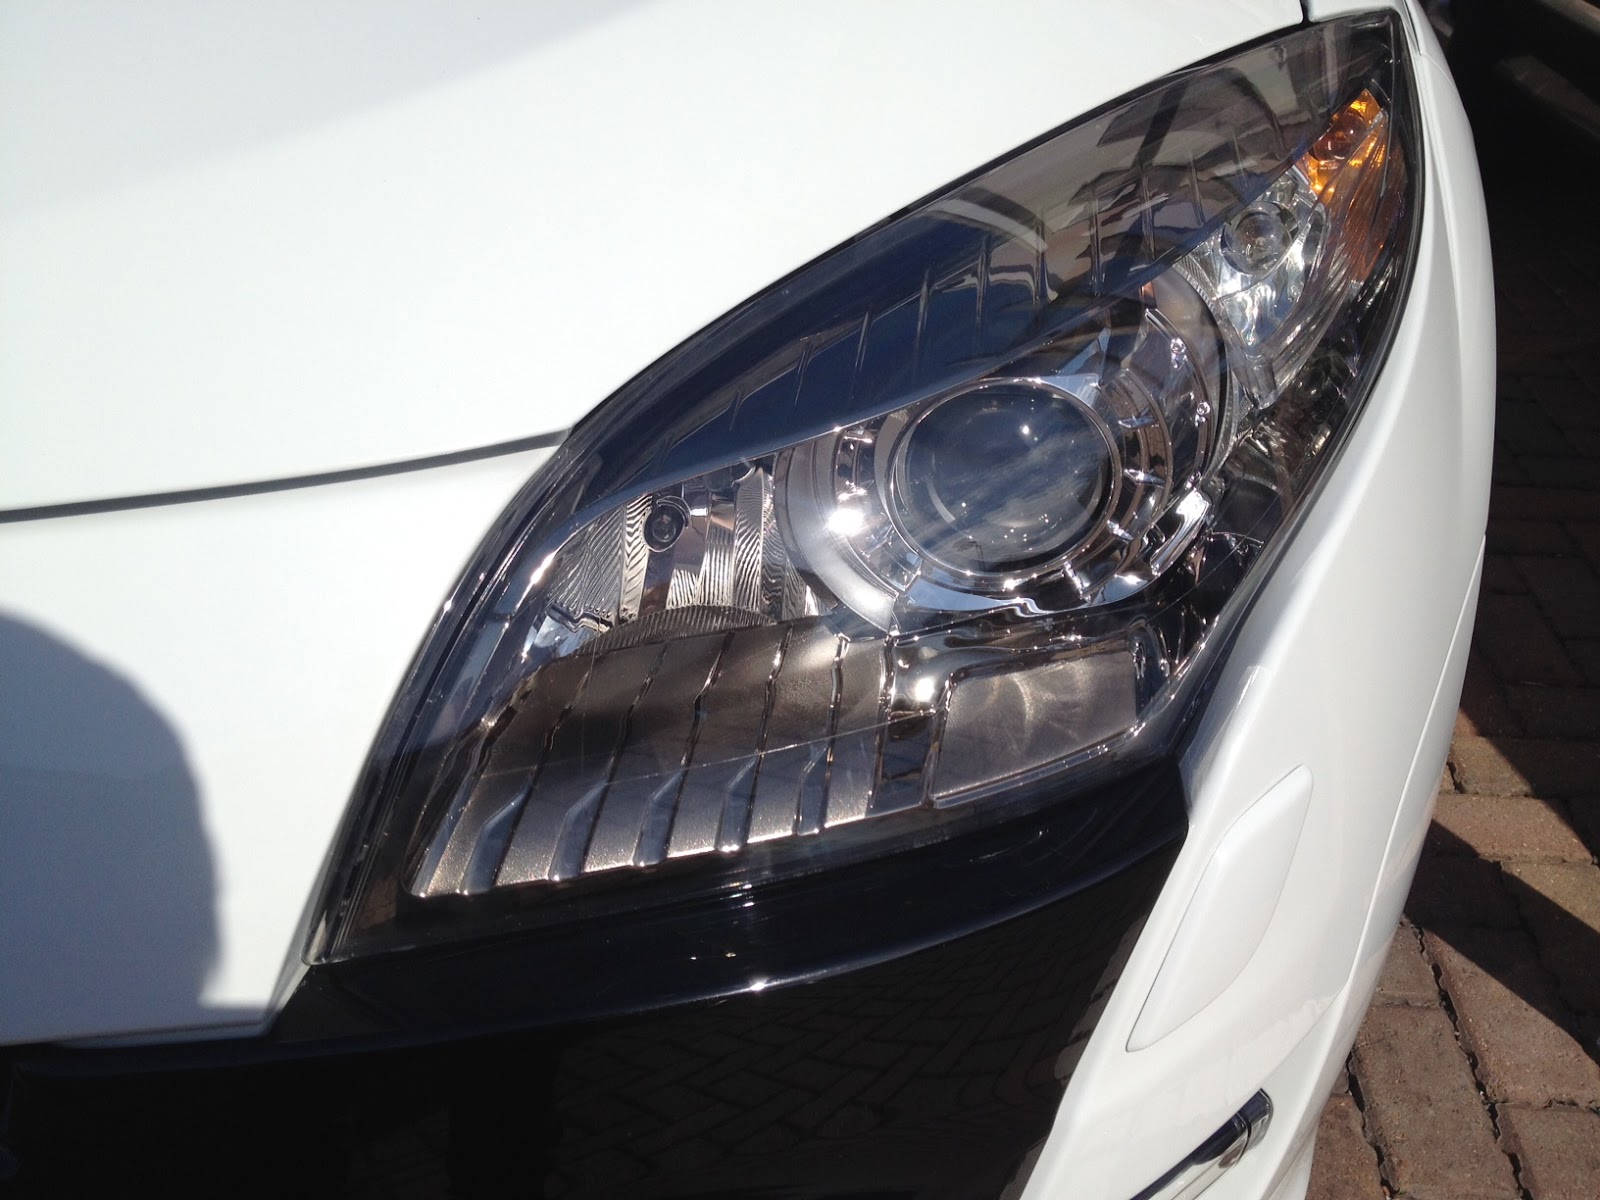
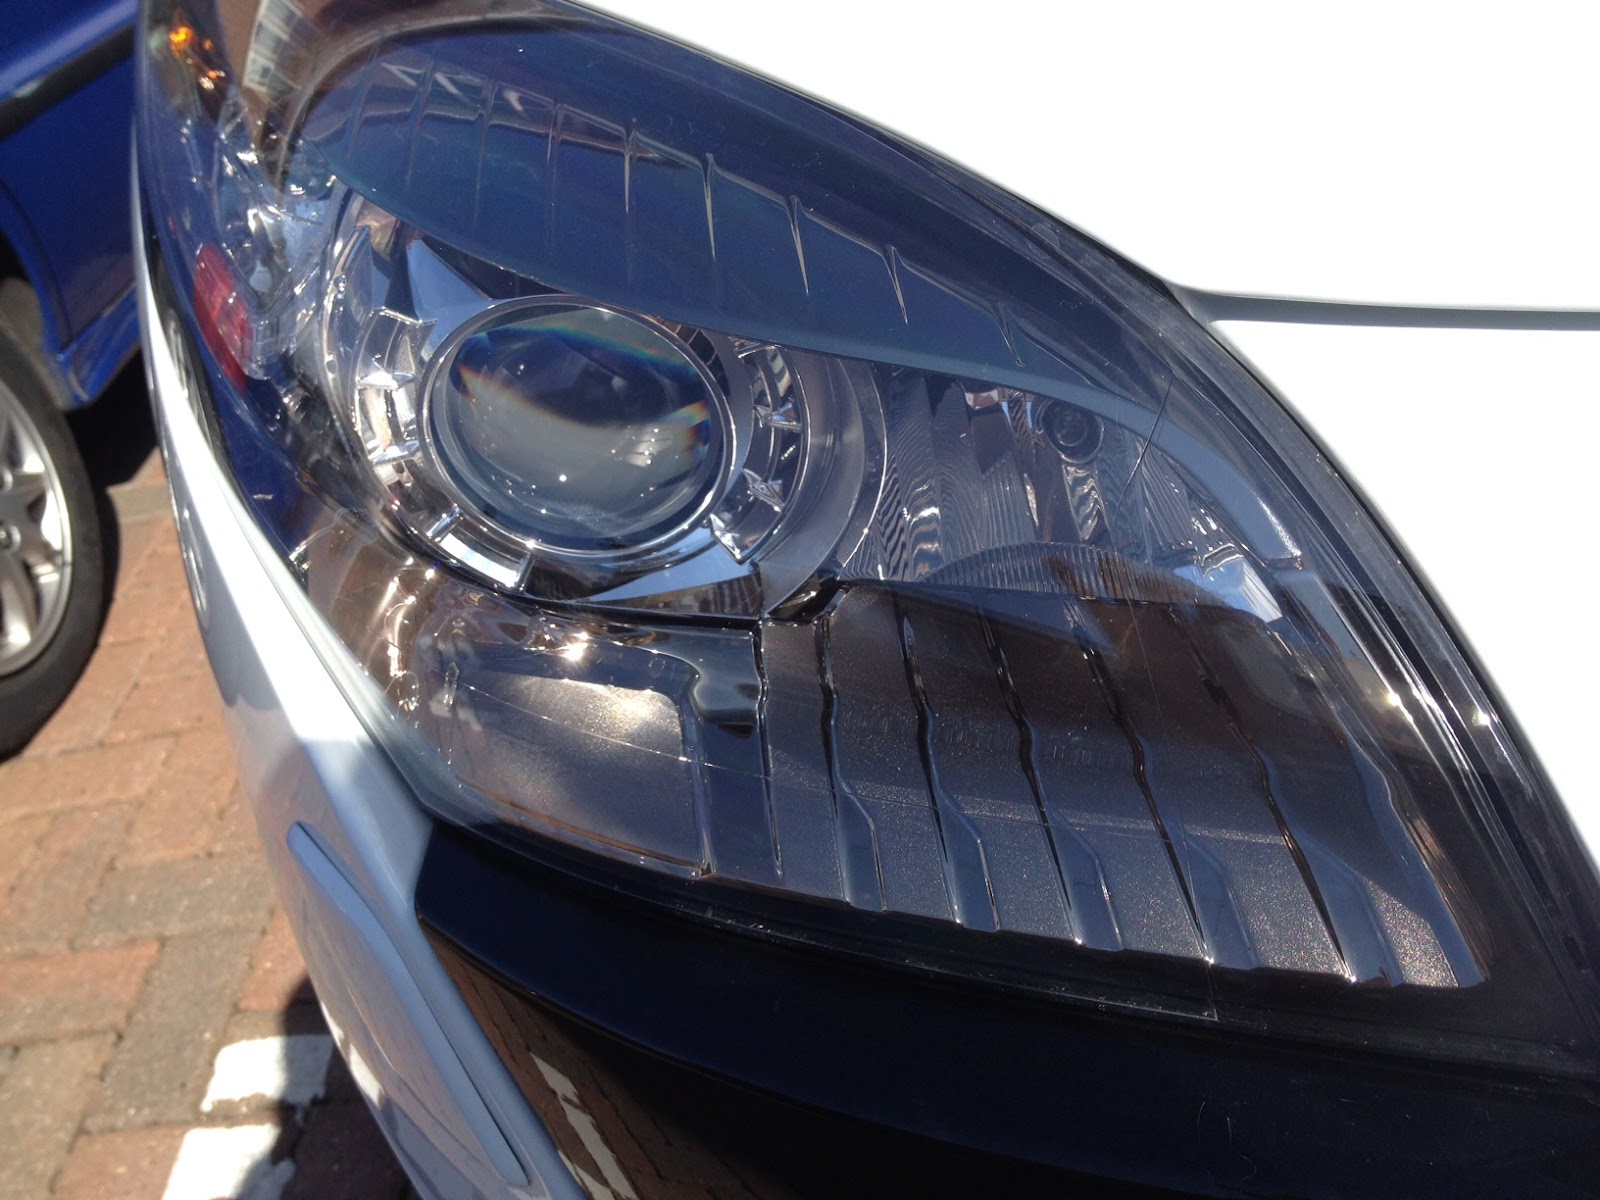
Just took some pics of my xenon headlamps to compare against a spare non-xenon i have from the original car. In my opinion other than nice looking projectors in the headlamps, the black internal housing gives a much sleeker look to the xenon headlamps. It gives them a dark tinted appearance. For more information about the conversion from non-xenon to xenon Click here.
Below are the pics: